Stepping into the world of acrylic nails can feel both exciting and a little daunting. With so many products on the market, one of the first and most crucial decisions you'll face is choosing the right acrylic powder. This choice is paramount, as it directly impacts the ease of application, the quality of your finished set, and ultimately, your confidence as you learn. For anyone just starting out, finding the best acrylic powder for beginners isn't just about picking a random jar; it's about selecting a product that forgives mistakes, offers smooth consistency, and sets you up for success.
This comprehensive guide is designed to cut through the noise, providing you with the essential knowledge and practical advice needed to make an informed decision. We'll delve into what makes a good acrylic powder, what to look for, and how to ensure your initial foray into nail artistry is as smooth and rewarding as possible. Our aim is to equip you with the insights that professionals often share, helping you avoid common pitfalls and truly enjoy the creative process of crafting beautiful, durable acrylic nails right from your very first attempt.
Table of Contents
- Why Acrylic Nails Are a Great Choice for Beginners
- Understanding Acrylic Powder: What's Inside?
- Key Factors When Choosing the Best Acrylic Powder for Beginners
- Top Picks: Recommended Acrylic Powder Brands for Novices
- Beyond the Powder: Essential Tools for Acrylic Application
- Mastering the Application: Tips for Beginners
- Maintaining Your Acrylic Nails for Longevity
- Where to Purchase Your First Acrylic Powder Kit
Why Acrylic Nails Are a Great Choice for Beginners
Acrylic nails have long been a cornerstone of the nail industry, cherished for their incredible durability and versatility. For a beginner, this robust nature is a significant advantage. Unlike gel or dip powder systems that might require specific curing lamps or quick application speeds, traditional acrylics offer a unique blend of workability and strength. They are formed by mixing a liquid monomer with a powdered polymer, creating a pliable bead that can be sculpted onto the nail. This mixture then air-dries and hardens, forming a resilient layer. One of the primary reasons acrylics are often recommended for those new to nail enhancements is their forgiveness. The setting time, while variable depending on the product and environment, is generally slower than some other systems, giving you more time to manipulate the product and perfect your shape before it cures. This extended working time is invaluable for learning the proper application techniques, from creating the perfect bead to achieving a smooth apex. Furthermore, acrylics are exceptionally strong, making them less prone to chips or breaks, which is reassuring when you're still mastering the art of everyday wear and tear. They also serve as an excellent canvas for various nail art designs, from simple color applications to intricate 3D embellishments, allowing your creativity to flourish as your skills develop.Understanding Acrylic Powder: What's Inside?
At its core, acrylic powder is a polymer, specifically a polymethyl methacrylate (PMMA) or a similar acrylic polymer. When combined with a liquid monomer (typically ethyl methacrylate, EMA), it undergoes a chemical reaction that creates a strong, durable bond. Understanding these basic components is crucial because the quality and specific formulation of the powder directly influence its performance. Good quality acrylic powder for beginners will have a finely milled consistency. This fine milling ensures that the powder mixes smoothly with the monomer, creating a consistent, bubble-free bead that is easy to control and sculpt. Inferior powders might be gritty, leading to lumpy applications and a less professional finish. Beyond the primary polymer, powders can contain various additives: * **Pigments:** For colored powders, these provide the desired hue. * **UV Inhibitors:** These help prevent yellowing, especially in clear and white powders, when exposed to sunlight. * **Flow Modifiers:** These can influence how easily the product self-levels. * **Plasticizers:** To enhance flexibility and reduce brittleness. When you're looking for the best acrylic powder for beginners, you're essentially looking for a product where these components are balanced to provide optimal workability and durability.The Importance of Quality Ingredients
You might be tempted by cheaper options when starting out, but when it comes to acrylic powder, quality truly matters. The old adage, "you get what you pay for," often holds true here. Poor quality ingredients can lead to a host of problems: * **Poor Adhesion:** Nails lifting prematurely, leading to frustration and damage to natural nails. * **Discoloration:** Clear powders turning yellow, or white powders becoming dingy over time. * **Brittleness:** Nails that crack or break easily, despite the inherent strength of acrylics. * **Difficult Application:** Powders that are too sticky, too runny, or too fast-setting, making it incredibly challenging for a novice to achieve a smooth application. * **Allergic Reactions:** Low-grade products, especially those containing banned substances like MMA (methyl methacrylate), are far more likely to cause severe allergic reactions and damage to the nail plate. Investing in a reputable, professional-grade acrylic powder from the outset means you're setting yourself up for success. These products are formulated to work synergistically with their corresponding monomers, ensuring consistent results and a safer application experience. Remember, your best interests are served by choosing quality products that protect your health and yield beautiful results.Key Factors When Choosing the Best Acrylic Powder for Beginners
When navigating the vast array of acrylic powders, several key factors should guide your selection, particularly if you're a beginner. The "best" choice isn't universal; it depends on what makes the learning process easiest for you. * **Curing Time (Setting Speed):** This is perhaps the most critical factor for beginners. * **Slow-Set Powders:** These are your best friends as a novice. They offer an extended working time, allowing you to perfect your bead, smooth out imperfections, and sculpt the nail without feeling rushed. This extra time is invaluable for understanding the product's behavior and refining your technique. * **Medium-Set Powders:** Once you gain a little confidence, you might transition to these. They offer a good balance between working time and efficiency. * **Fast-Set Powders:** These are generally for experienced technicians who can work quickly and precisely. Avoid these initially, as they can be incredibly frustrating for beginners. * **Consistency and Workability:** The powder should mix effortlessly with the monomer to form a smooth, self-leveling bead. It shouldn't be stringy, crumbly, or overly runny. A good powder will allow you to pick up a consistent bead size and shape every time. * **Color Clarity:** For clear powders, look for crystal clarity that doesn't yellow. For white powders, a crisp, true white is ideal. Pink powders should offer a natural, healthy nail bed appearance. The best ones will maintain their color integrity over time. * **Odor:** While all acrylic systems have an odor due to the monomer, some brands offer "low-odor" or "odorless" options. While "odorless" is a bit of a misnomer (they still have a scent, just less potent), these can be more comfortable to work with, especially in a home environment. However, always ensure proper ventilation regardless of the product's scent level.Safety First: What to Look Out For
Your health and safety should always be a top priority. When choosing acrylic powder and liquid, it's best to be aware of certain ingredients and practices: * **MMA (Methyl Methacrylate) vs. EMA (Ethyl Methacrylate):** This is non-negotiable. **Always choose EMA-based monomers and powders.** MMA is an industrial-grade chemical that is highly rigid, difficult to remove, and can cause severe damage to the natural nail, including permanent loss of the nail plate. It's also known for causing severe allergic reactions. Many professional organizations and regulatory bodies discourage or ban its use in nail products. EMA, on the other hand, is designed for cosmetic use, is safer, more flexible, and easier to remove. Always check product labels to ensure they are EMA-based. * **Ventilation:** Even with EMA products, proper ventilation is crucial. Work in a well-ventilated area, ideally near an open window or with an air purifier. This protects you from inhaling fumes, which can cause headaches or respiratory irritation over time. * **Brand Reputation:** Stick to reputable brands that are well-known in the professional nail community. These brands typically adhere to higher manufacturing standards and prioritize safety and performance. This is the best way to ensure you're getting a reliable and safe product.Top Picks: Recommended Acrylic Powder Brands for Novices
While specific product recommendations can vary based on regional availability and personal preference, I can guide you on the characteristics of brands that generally produce the best acrylic powder for beginners. When starting out, look for brands that are widely recognized in professional beauty supply stores or online retailers that cater to nail technicians. These brands often have comprehensive lines that include beginner-friendly options. **Characteristics of Beginner-Friendly Brands:** * **Consistent Quality:** The powder should consistently perform the same way with each use, allowing you to learn and build muscle memory. * **Medium to Slow Setting:** As discussed, this is paramount. Brands that explicitly state "slow set" or "beginner formula" are ideal. * **Smooth Flow and Self-Leveling:** Products that naturally spread and smooth out without excessive manipulation are a dream for beginners. This reduces the likelihood of lumps and uneven surfaces. * **Good Adhesion:** Products that adhere well to the properly prepped natural nail will prevent frustrating lifting, which is a common issue for novices. * **Clear Instructions/Resources:** Reputable brands often provide clear instructions, tutorials, or even starter kits, which can be incredibly helpful. Instead of naming specific brands (as formulations can change and personal preference plays a huge role), focus on seeking out brands that professionals recommend for training or student kits. These are typically designed with ease of use and forgiveness in mind. Look for brands that are transparent about their ingredients (e.g., clearly stating EMA-based). Reading reviews from other beginners can also be very insightful, as they will often highlight how easy or difficult a product was to work with.Clear, White, and Pink: Your Starter Palette
For your initial purchase, you don't need a rainbow of colors. The best acrylic powder for beginners will typically come in three essential shades, forming your foundational palette: * **Clear Acrylic Powder:** This is your versatile workhorse. It's perfect for encapsulating glitter, dried flowers, or other nail art elements, and for creating a strong, transparent base or top layer. It allows you to see your work clearly as you sculpt. * **White Acrylic Powder:** Essential for creating crisp, clean French tips. A good white powder should be opaque and bright, without streaking or yellowing. * **Natural Pink/Cover Pink Acrylic Powder:** These powders are designed to mimic the natural color of the nail bed, often used to extend the nail bed appearance, cover imperfections, or create a classic "pink and white" look. They come in various opacities and shades, so you might choose one that best matches a natural nail tone. Starting with these three allows you to practice fundamental techniques, from simple overlays to basic French manicures, without being overwhelmed by too many choices.Beyond the Powder: Essential Tools for Acrylic Application
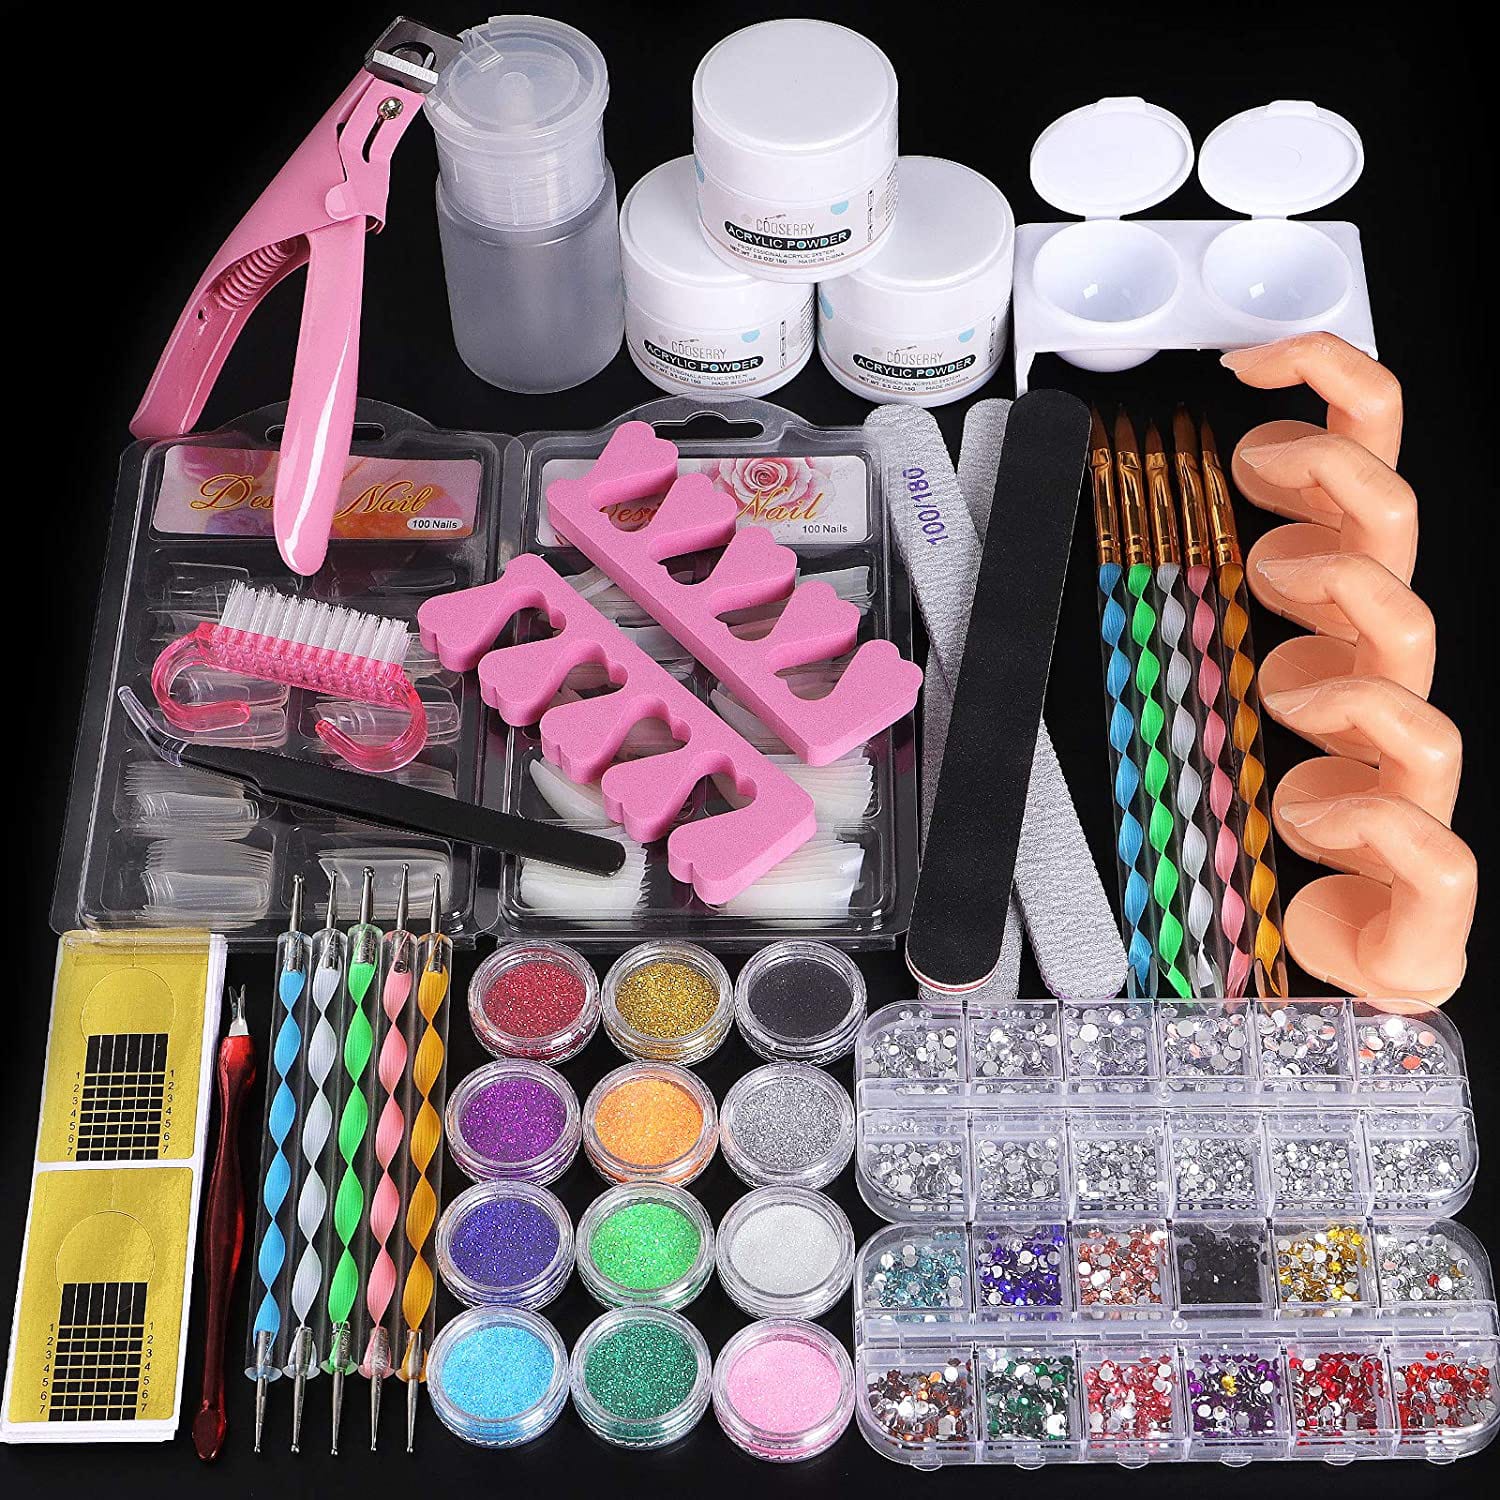
Having the best acrylic powder for beginners is only half the battle; you also need the right tools to apply it effectively. Think of it like cooking: you can have the best ingredients, but without the right utensils, the dish won't come together. * **Monomer (Acrylic Liquid):** This is the liquid component that reacts with the powder. It's crucial to use the monomer from the same brand as your powder, as they are formulated to work together perfectly. Mixing brands can lead to inconsistent curing, poor adhesion, or discoloration. * **Acrylic Nail Brush:** This is arguably the most important tool. For beginners, a size #8 or #10 Kolinsky sable brush is often recommended. Kolinsky brushes are known for their ability to hold a perfect bead of product and maintain their shape. Avoid synthetic brushes for acrylics, as they don't perform as well. Ensure you clean and condition your brush properly after each use to prolong its life. * **Dappen Dish:** A small, heavy glass or ceramic dish used to hold your monomer. Its weight prevents accidental spills, and glass/ceramic won't react with the monomer. * **Nail File and Buffer:** You'll need a variety of grits. A 100/180 grit file is good for shaping the extension and removing bulk, while a 240 grit or higher is for refining the surface. A buffer (100/180 or 220/280) is essential for smoothing the surface before applying top coat. * **Nail Dehydrator and Primer:** These are vital for proper adhesion. The dehydrator removes oils and moisture from the natural nail plate, and the primer creates a sticky surface for the acrylic to bond to. Skipping these steps is a common cause of lifting. * **Lint-Free Wipes:** For cleansing the nail plate and wiping your brush. * **Nail Tips (Optional) and Tip Cutter:** If you're extending the length of the nail, you'll need tips and a sharp cutter. * **Nail Forms (Optional):** An alternative to tips for sculpting extensions, offering a more natural look. * **Dust Brush:** To remove filing dust. * **Top Coat:** A gel top coat (cured with a UV/LED lamp) or a no-wipe top coat will provide a high-shine finish and protect your acrylics. Having these tools ready before you start will make your application process much smoother and more efficient.Mastering the Application: Tips for Beginners
Even with the best acrylic powder for beginners, success hinges on proper application technique. This isn't something you master overnight; it requires patience and practice. 1. **Nail Preparation is Key:** This cannot be stressed enough. Proper prep prevents lifting. * Push back cuticles. * Gently buff the natural nail to remove shine (do not over-file). * Cleanse with a dehydrator. * Apply primer sparingly. * Ensure the nail is completely dust-free. 2. **Achieving the Perfect Bead:** This is the heart of acrylic application. * Dip your brush into the monomer, wiping off excess on the side of the dappen dish. * Gently tap the wet brush into the acrylic powder. The goal is to pick up a perfectly saturated bead – not too wet (runny) and not too dry (crumbly). * Practice picking up different bead sizes. 3. **The Three-Zone Application Method:** This is the best way to apply acrylic for even coverage and strength. * **Zone 1 (Free Edge):** Place your first bead on the free edge (or tip). Press and pull the product to create the desired length and shape. * **Zone 2 (Apex/Stress Area):** Place your second, slightly larger bead in the middle of the nail (the stress area). This is where the nail needs the most strength and where you build the "apex" – the highest point of the nail's curve, which provides structural integrity. Gently guide the product towards the free edge and towards the cuticle. * **Zone 3 (Cuticle Area):** Place a small, thin bead near the cuticle, ensuring it's not touching the skin. Gently feather it down towards the apex, creating a smooth, seamless transition. 4. **Work Quickly but Deliberately:** While slow-set powders offer more time, you still need to be efficient. Overworking the product can lead to air bubbles or a lumpy finish. 5. **Clean Your Brush Frequently:** Wipe your brush on a lint-free wipe after each bead application to prevent product buildup and maintain its shape. 6. **Practice, Practice, Practice:** Your first set won't be perfect, and that's okay! Practice on a practice hand or nail tips before moving to your own nails. Consistency comes with repetition.Troubleshooting Common Beginner Mistakes
Every beginner encounters challenges. Knowing how to address them can save you a lot of frustration. * **Lifting:** The most common issue. Usually caused by improper nail preparation (oils, dust, not enough primer), product touching the skin/cuticle, or an incorrect powder-to-liquid ratio. Re-evaluate your prep routine and ensure clean application around the cuticle. * **Too Thick/Bulky:** Often due to picking up too large beads or not properly sculpting the product. Focus on thinner, more controlled beads and proper apex placement. Filing will also help refine the shape. * **Too Thin/Weak:** Not enough product, leading to flimsy nails that break easily. Ensure you're building enough strength in the stress area (apex). * **Bubbles:** Can be caused by overworking the product, an incorrect liquid-to-powder ratio (too dry), or shaking the monomer bottle. Work smoothly and ensure your beads are perfectly saturated. * **Uneven Surface:** Inconsistent bead placement or not enough self-leveling. Practice smoothing the product with your brush before it sets. Filing is your friend for refining the surface. * **Yellowing:** Typically due to low-quality products without UV inhibitors, or using non-EMA monomer. Ensure your products are professional-grade and EMA-based. Remember, every expert was once a beginner. It's best to embrace the learning curve and view mistakes as opportunities to improve.Maintaining Your Acrylic Nails for Longevity
Once you've successfully applied your first set of acrylics, proper maintenance is key to their longevity and the health of your natural nails. Even the best acrylic powder for beginners needs good aftercare to truly shine. * **Avoid Harsh Chemicals:** Wear gloves when doing housework, especially when using cleaning products. Chemicals can degrade the acrylic and cause lifting or discoloration. * **Moisturize Regularly:** Keep your cuticles and surrounding skin hydrated with cuticle oil daily. This prevents dryness and cracking, which can lead to lifting. * **Be Gentle:** While acrylics are strong, they are not invincible. Avoid using your nails as tools (e.g., opening cans, prying things). * **Schedule Fills:** Acrylic nails typically need fills every 2-3 weeks, depending on your natural nail growth. This involves filing down the existing acrylic, rebalancing the nail, and applying new product to the growth area. Do not try to make them last longer than they should, as this can put undue stress on your natural nails. * **Professional Removal:** When it's time to remove your acrylics, it's best to do it properly to avoid damaging your natural nails. Soaking off with pure acetone is the safest method. Avoid peeling or prying them off, as this will rip layers of your natural nail. By following these simple maintenance tips, you can ensure your acrylic nails look their best and your natural nails remain healthy underneath.Where to Purchase Your First Acrylic Powder Kit
Finding the best acrylic powder for beginners and accompanying tools is easier than ever, thanks to a variety of purchasing options. * **Professional Beauty Supply Stores:** Stores like Sally Beauty Supply (in the US) or other local beauty supply stores often carry a range of professional-grade products. The advantage here is that you can see the products in person, and sometimes staff can offer advice. * **Online Retailers:** Websites like Amazon, eBay, and specialized nail supply websites (e.g., Nail Supply Inc., The Nail Superstore, or specific brand websites) offer a vast selection. This is often where you'll find the most competitive prices and a wider variety of brands. Always check seller reviews and ensure you're buying authentic products. * **Starter Kits:** Many reputable brands offer beginner or student kits that include a small amount of powder, monomer, a brush, and other essential tools. These kits are an excellent starting point as they ensure product compatibility and provide everything you need to begin. This is often the best way to get started without feeling overwhelmed by individual purchases. When purchasing, always read product descriptions carefully. Look for clear indications that the product is EMA-based and suitable for professional use. Pay attention to reviews, especially those from other beginners, as they can provide valuable insights into the product's ease of use and overall performance. Remember, this is an investment in your new hobby or skill, so choose wisely.Conclusion
Embarking on your journey into acrylic nail application is an exciting endeavor, and choosing the best acrylic powder for beginners is the foundational step towards success. We've explored the crucial factors that differentiate a good product from a great one for novices, emphasizing the importance of slow-setting formulas, quality ingredients, and the absolute necessity of EMA-based products for your safety and the health of your nails. Remember, the journey to mastering acrylics is a marathon, not a sprint; patience, consistent practice, and the right tools will be your greatest allies. Don't be discouraged by initial challenges; every expert nail technician started exactly where you are now. By focusing on proper nail preparation, understanding the product's behavior, and utilizing the right application techniques, you are well on your way to creating beautiful, durable acrylic nails. We hope this guide has provided you with the confidence and knowledge to make informed choices. Now, it's your turn to dive in! What are your thoughts on starting with acrylics, or do you have a favorite beginner-friendly product? Share your experiences and questions in the comments below, and let's build a supportive community for aspiring nail artists. Don't forget to explore our other articles for more in-depth nail care tips and tricks!