Table of Contents
- Introduction
- Understanding the Trowel: More Than Just a Tool
- Why Trowel Size Matters for 12x24 Tiles
- The Science Behind Mortar Coverage and Trowel Notches
- Recommended Trowel Sizes for 12x24 Tiles
- Preparing for Success: Substrate, Mortar, and Technique
- Common Mistakes and How to Avoid Them
- Ensuring E-E-A-T in Your Tiling Project
- Final Checks and Long-Term Durability
- Conclusion
Introduction
Embarking on a tiling project, especially with popular large format tiles like 12x24 inches, presents unique challenges and demands precision. One of the most critical decisions that directly impacts the success, durability, and aesthetic appeal of your tiled surface is selecting the correct trowel size for 12x24 tile. This seemingly small detail can make all the difference between a professional, long-lasting installation and one plagued by issues like lippage, hollow spots, and eventual tile failure.
Understanding the nuances of trowel selection is not merely about picking a tool; it's about ensuring proper mortar coverage, which is the backbone of any robust tile installation. This comprehensive guide will demystify the process, providing you with the expert knowledge needed to confidently choose the ideal trowel for your 12x24 tile project, safeguarding your investment and delivering a flawless finish.
Understanding the Trowel: More Than Just a Tool
Before diving into specific sizes, it's essential to grasp what a trowel truly is and its fundamental role in construction. A trowel is a small hand tool used for digging, applying, smoothing, or moving small amounts of viscous or particulate material. While common varieties include the garden trowel, which most gardeners are already familiar with for digging and planting, our focus here is on the masonry trowel—a vital tool for spreading, smoothing, and shaping mortar or concrete during construction.
The Anatomy of a Trowel
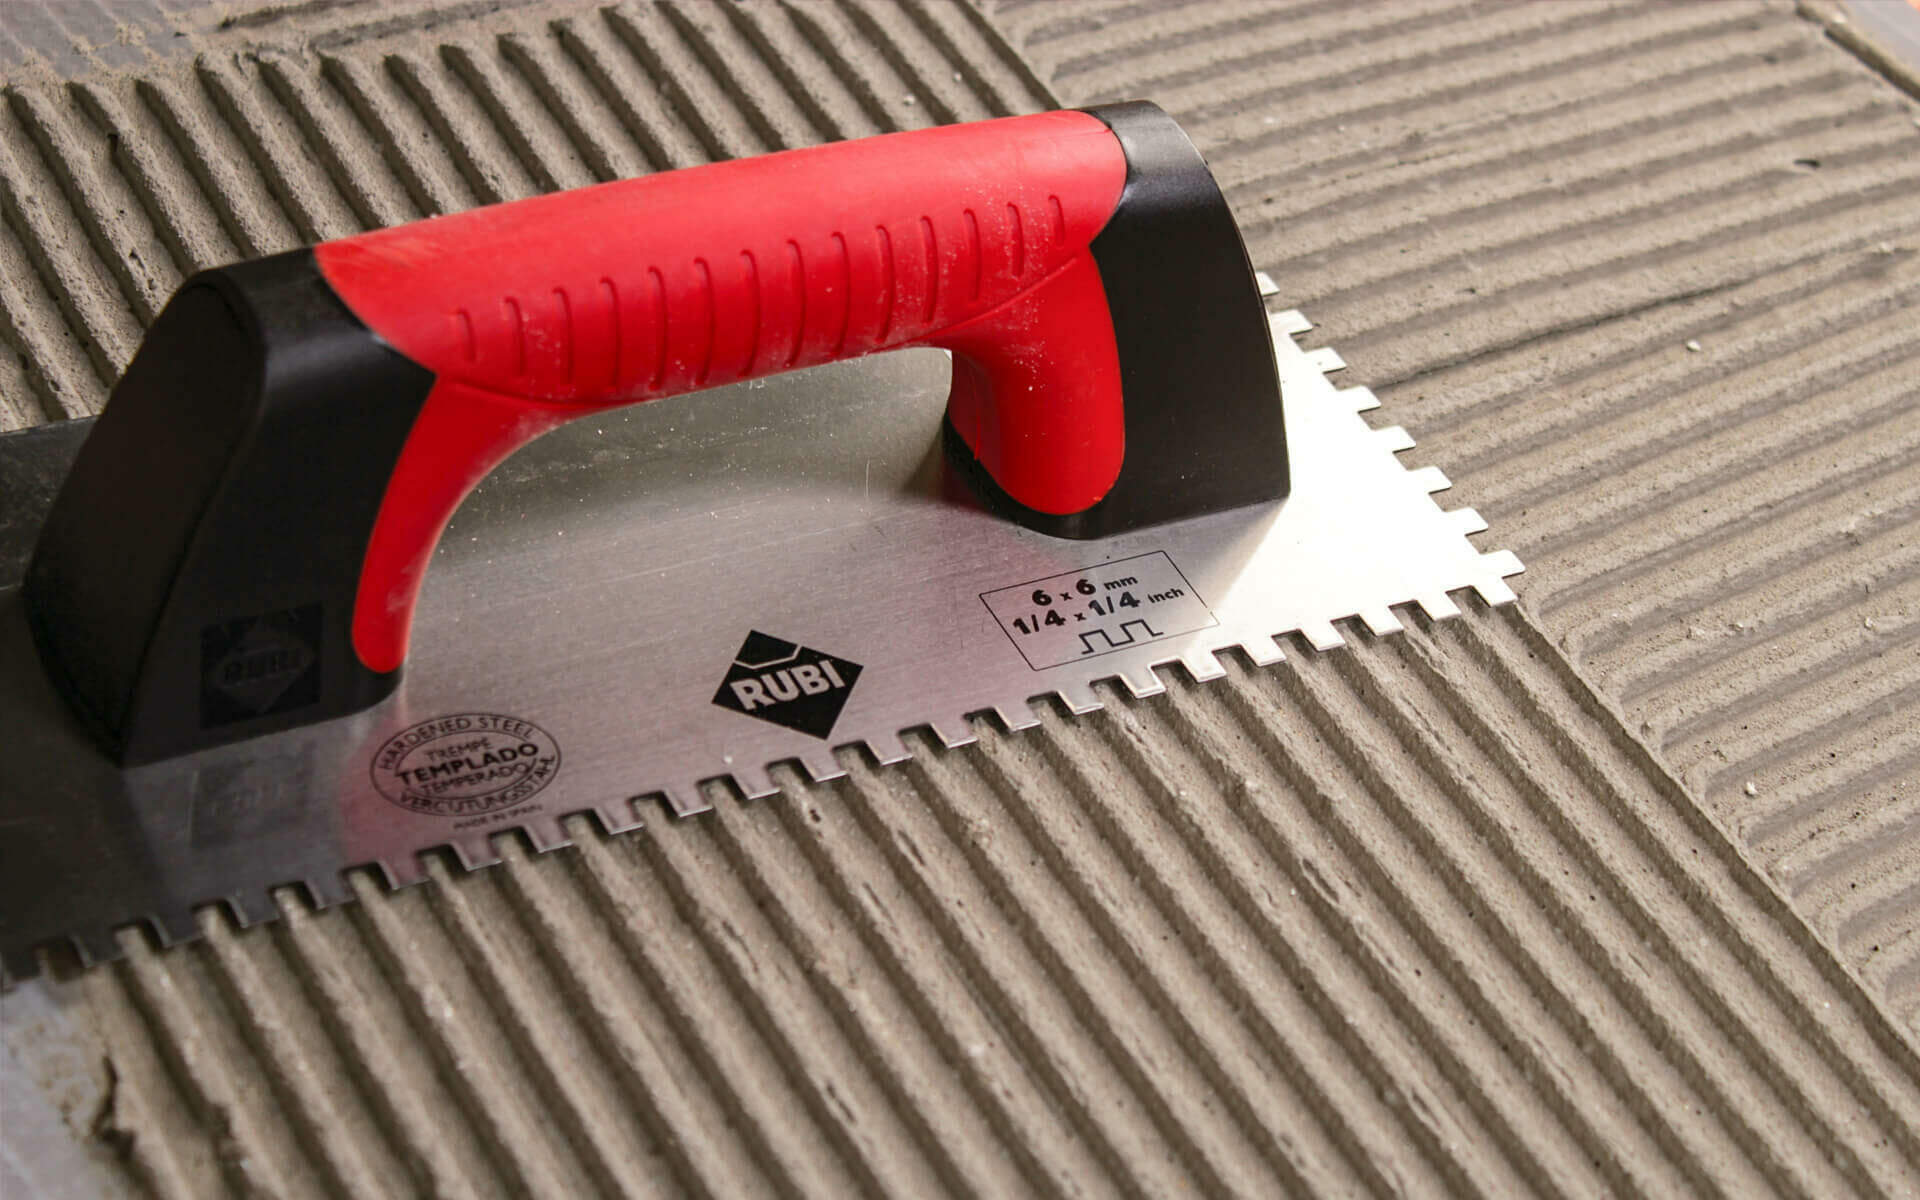
Despite its unassuming appearance, the trowel plays an essential role in construction and masonry. In general, a trowel refers to any small handheld tool with a specialized blade. For tiling, this blade is typically made of steel and features a series of notches along one or more edges. Its flat, pointed blade and ergonomic handle make it ideal for applying and spreading adhesives. The flatness of the trowel is used to tamp down the cement that holds the bricks together, or in our case, the mortar that secures tiles. The point at the top of the trowel can also be used to shape concrete and masonry, offering versatility beyond just spreading.
Different Trowel Types and Their Uses
Discover the definition and primary functions of a trowel, its historical significance, various types and materials used, proper usage techniques, safety tips, maintenance, and care. For tile installation, the key distinction lies in the shape and size of the notches. Common notch types include:
- Square-notch: The most common type, ideal for general-purpose tiling. The square notches create ridges of mortar, allowing air to escape when the tile is pressed down.
- U-notch: Creates rounded ridges of mortar. Often preferred for certain types of large format tiles or when a slightly different mortar bed profile is desired.
- V-notch: Typically used for smaller tiles or mosaic tiles, as it spreads a thinner layer of adhesive.
- Slant-notch: Less common, designed for specific adhesive applications.
The answer often lies in a humble tool, and for tiling, the specific design of that tool—the trowel—is paramount. Each notch pattern serves a unique purpose in ensuring optimal mortar coverage and adhesion.
Why Trowel Size Matters for 12x24 Tiles
When dealing with large format tiles like 12x24 inches, the importance of the correct trowel size for 12x24 tile cannot be overstated. These larger tiles require a substantial and consistent bed of mortar to achieve full coverage and prevent issues. Unlike smaller tiles that might forgive minor inconsistencies, 12x24 tiles are prone to "lippage" (where one tile edge is higher than an adjacent one) and "hollow spots" if the mortar isn't spread correctly or if there isn't enough of it.
Insufficient mortar coverage leads to weak bonds. Over time, foot traffic, temperature changes, and general wear can cause these weakly bonded areas to crack, leading to loose tiles, grout failure, and even water penetration. Furthermore, large tiles inherently weigh more, demanding a robust adhesive layer to prevent sagging or shifting during installation and throughout their lifespan. A trowel that is too small will necessitate excessive effort to achieve proper coverage, leading to fatigue and inconsistent results, while one that is too large might waste mortar or make it difficult to manage.
The Science Behind Mortar Coverage and Trowel Notches
The primary function of a trowel's notches is to create uniform ridges of mortar. When a tile is pressed into this notched mortar bed, the ridges collapse and spread, filling the entire back of the tile and the substrate. This process, known as "back-buttering" the tile and "combing" the substrate, is crucial for achieving the recommended 80-95% mortar coverage for interior applications and 95% or more for exterior or wet applications (like showers).
The size and shape of the trowel's notches directly determine the amount of mortar applied and the height of the ridges. For large format tiles, a larger notch size is required to ensure enough mortar is present to fully support the tile and compensate for any slight warpage in the tile itself or minor irregularities in the substrate. If the notches are too small, the mortar bed will be too thin, resulting in insufficient coverage and potential bond failure. Conversely, if the notches are excessively large for the application, it can lead to too much mortar, making it difficult to set tiles level and potentially causing excessive squeeze-out through grout lines.
Proper mortar coverage is not just about adhesion; it's also about load distribution. A fully bedded tile distributes weight evenly across the entire surface, preventing stress concentrations that could lead to cracks. This is particularly vital for high-traffic areas or floors where heavy objects might be placed.
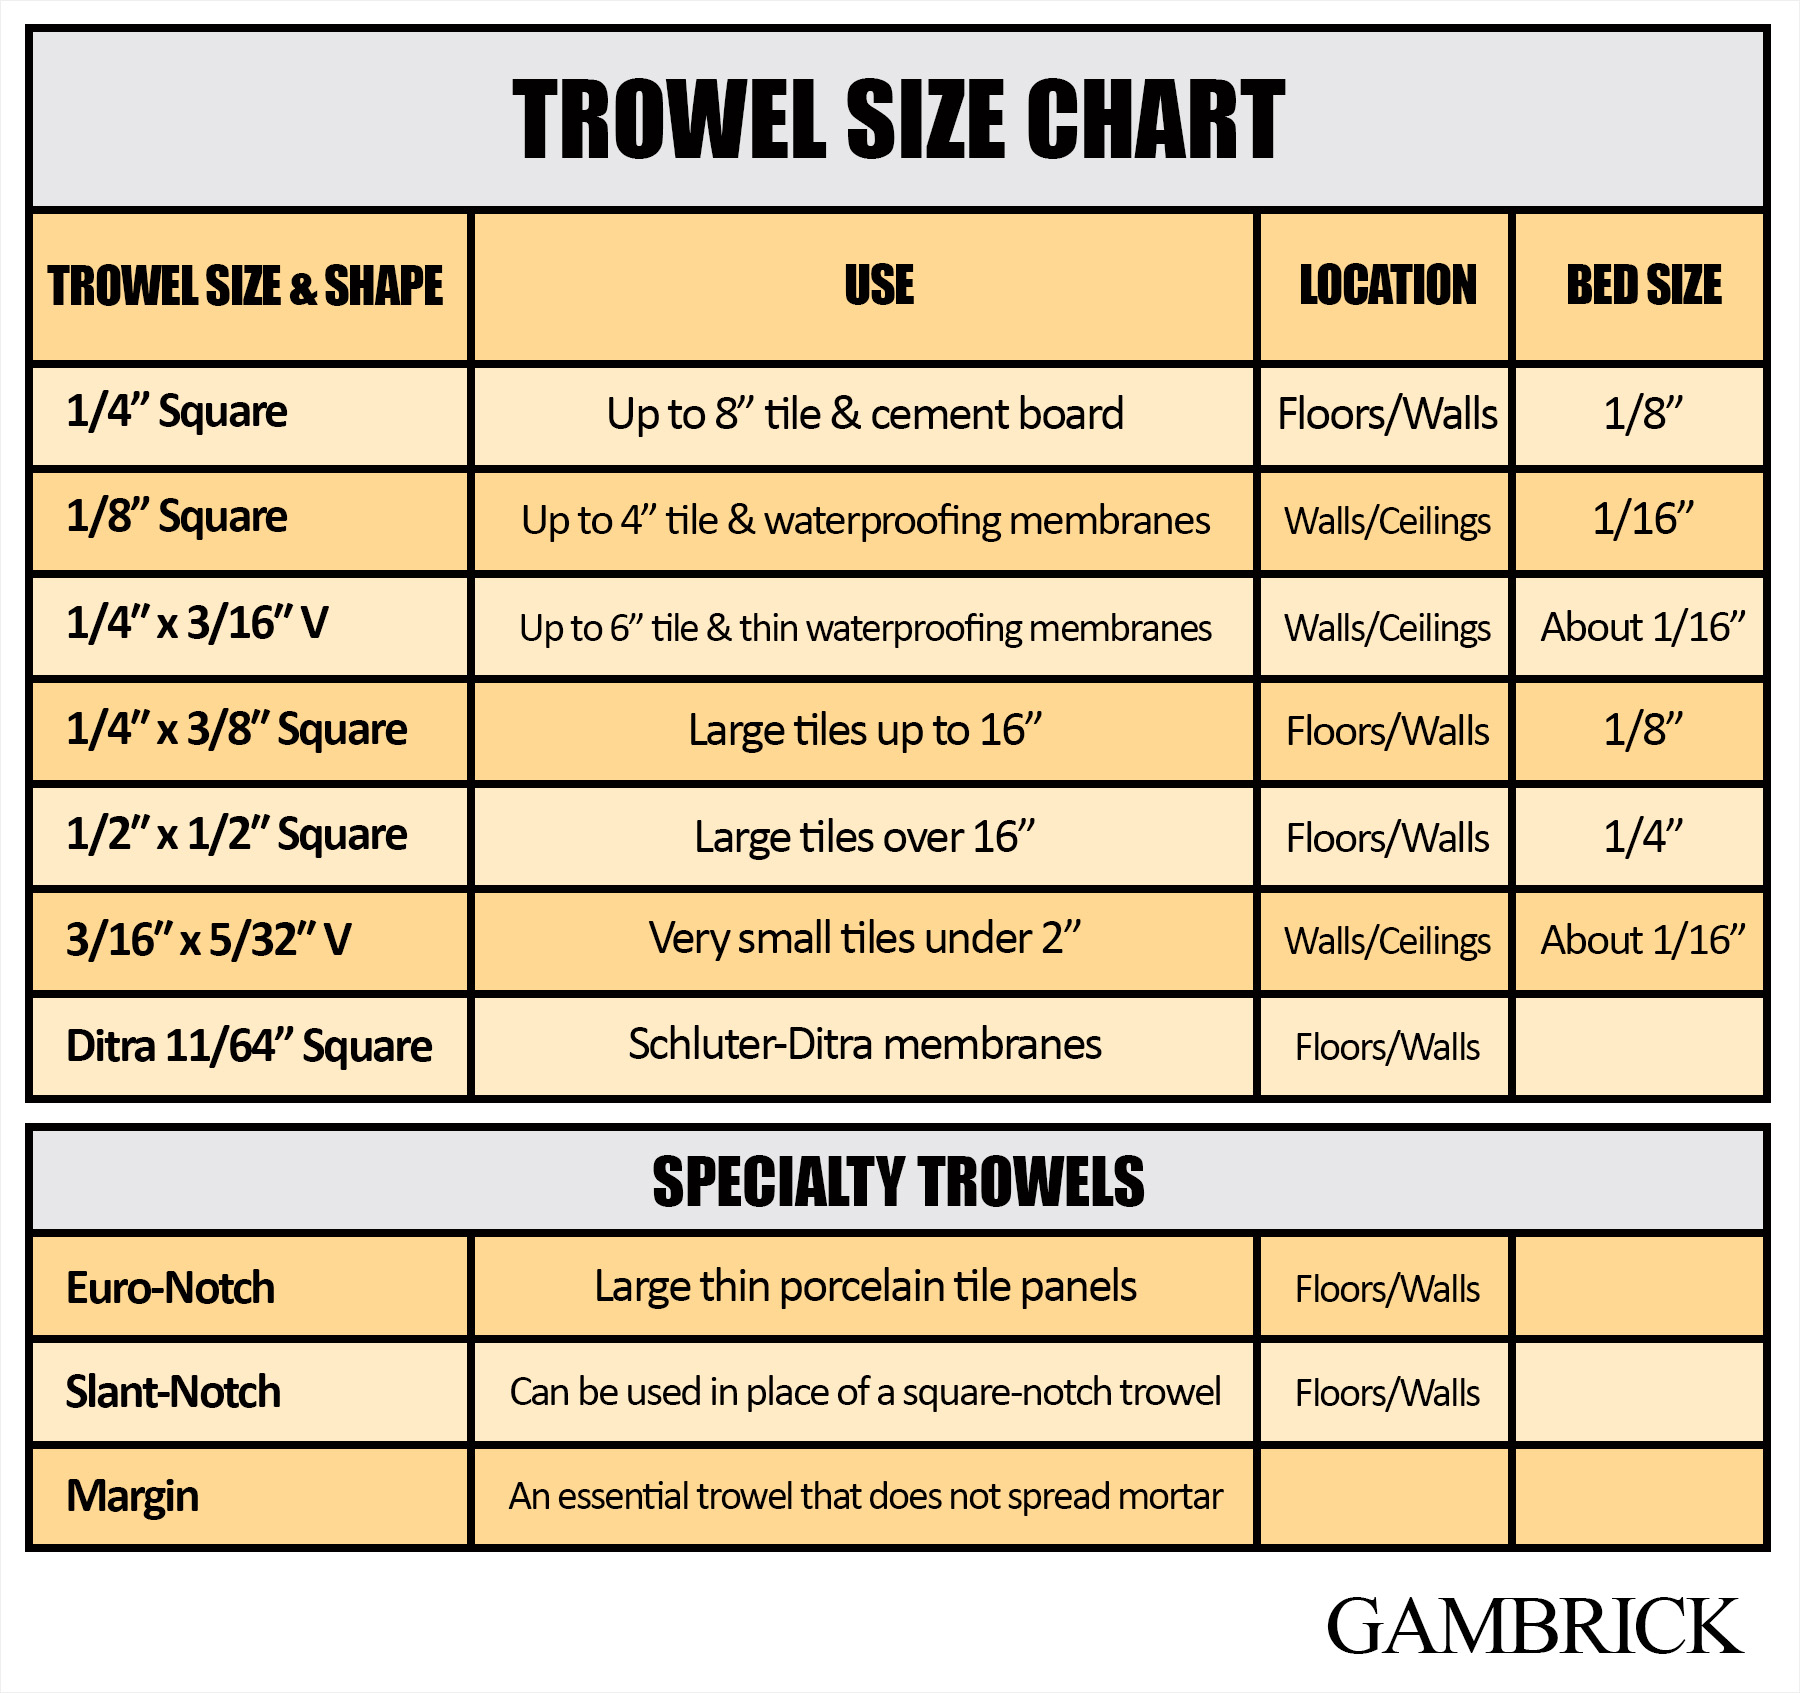
Recommended Trowel Sizes for 12x24 Tiles
When selecting the trowel size for 12x24 tile, the goal is to achieve maximum coverage without excessive mortar. While specific recommendations can vary slightly based on mortar type, substrate flatness, and tile back texture, there are general guidelines that industry experts and tile manufacturers endorse.
The 1/2-inch x 1/2-inch Square-Notch Trowel: A Common Choice
For most 12x24 inch tiles, a 1/2-inch x 1/2-inch square-notch trowel is often the go-to recommendation. This size provides a generous amount of mortar, creating ridges that are substantial enough to collapse and spread, ensuring excellent coverage on the back of the tile. This is particularly effective for achieving the necessary bond strength and preventing hollow spots that are common with larger tiles.
When using a 1/2-inch square-notch trowel, it's crucial to apply the mortar in straight, parallel lines, typically in one direction (e.g., all parallel to the longest edge of the tile). This technique facilitates the escape of air when the tile is pressed down, further contributing to solid coverage. Always perform a "lift test" on your first few tiles: after setting a tile, lift it back up to inspect the mortar coverage on both the substrate and the tile back. You should aim for at least 80% coverage for dry areas and 95% for wet areas or exterior installations. If you're not getting this, you might need to adjust your technique or consider a slightly larger notch.
When to Consider Larger Notches or U-Notches
While the 1/2-inch square-notch is a strong contender for the ideal trowel size for 12x24 tile, there are situations where a larger notch or a U-notch might be more appropriate:
- Heavily Textured or Irregular Tile Backs: Some large format tiles have very deep textures or an uneven back surface. In such cases, a 3/4-inch x 3/4-inch square-notch trowel or even a 1/2-inch x 3/4-inch U-notch trowel might be necessary to ensure the mortar fills all voids and provides adequate bond.
- Very Flat Substrates: If your substrate is exceptionally flat and true, a U-notch trowel (e.g., 1/2-inch U-notch) can sometimes provide superior coverage with less mortar, as the rounded ridges collapse more efficiently. However, this is less common for DIYers and more often seen in professional settings with highly prepared surfaces.
- Thick-Bed Mortar Applications: For certain specialized installations requiring a thicker mortar bed to achieve levelness over minor substrate irregularities, a larger trowel might be chosen, though this often goes hand-in-hand with specific thick-bed mortars.
- Exterior or Wet Area Installations: For areas exposed to moisture or extreme temperatures, 95% or more coverage is paramount. If a 1/2-inch square-notch isn't consistently achieving this with your specific mortar and tile, stepping up to a 5/8-inch or even 3/4-inch square-notch might be prudent.
Always remember that back-buttering the tile (applying a thin layer of mortar directly to the back of the tile with the flat side of the trowel before combing the substrate) is highly recommended for all large format tiles, regardless of the trowel size for 12x24 tile you choose. This ensures maximum adhesion and helps fill any slight depressions on the tile's back.
Preparing for Success: Substrate, Mortar, and Technique
Choosing the correct trowel size for 12x24 tile is only one piece of the puzzle. The success of your tiling project also heavily relies on proper substrate preparation, choosing the right mortar, and mastering your application technique.
- Substrate Preparation: The surface you're tiling on must be clean, dry, structurally sound, and as flat as possible. Any significant dips or humps will be magnified by large format tiles and can lead to lippage or hollow spots, even with the perfect trowel. Use a self-leveling compound if necessary for floors, or ensure walls are plumb and flat.
- Mortar Selection: Not all mortars are created equal. For large format tiles, use a medium-bed or large-and-heavy-tile (LHT) mortar. These mortars are formulated to resist slumping, provide better coverage, and bond effectively with heavier tiles. Always follow the manufacturer's mixing instructions precisely to achieve the correct consistency. Too wet, and it will slump; too dry, and it won't spread or bond properly.
- Application Technique:
- Back-Butter the Tile: As mentioned, apply a thin, even layer of mortar to the back of each 12x24 tile using the flat side of your trowel. This ensures 100% contact on the tile side.
- Comb the Substrate: Using your chosen trowel size for 12x24 tile, apply mortar to the substrate. Hold the trowel at a consistent 45-degree angle to the surface. This angle is crucial for forming consistent ridges.
- Consistent Direction: Always comb the mortar in one direction (e.g., parallel to the shortest side of the tile, or parallel to the direction you'll be setting the tile). This allows air to escape when the tile is set, preventing trapped air pockets and ensuring full coverage.
- Setting the Tile: Place the tile firmly onto the mortar bed. Wiggle it slightly back and forth or use a rubber mallet and a leveling system to ensure full contact and proper leveling.
- The Lift Test: Periodically lift a tile after setting it to visually inspect the mortar coverage. This is your best indicator of whether your trowel size and technique are correct. Adjust as needed.
Common Mistakes and How to Avoid Them
Even with the right trowel size for 12x24 tile, common errors can derail your project. Being aware of these pitfalls can save you time, money, and frustration:
- Using the Wrong Trowel Size: This is the most direct cause of problems. Too small, and you get insufficient coverage; too large, and it's hard to manage. Always refer to tile manufacturer recommendations and conduct lift tests.
- Inconsistent Trowel Angle: Holding the trowel at varying angles (e.g., 90 degrees vs. 45 degrees) will create inconsistent mortar ridge heights, leading to uneven coverage and lippage. Maintain a steady 45-degree angle.
- Swirling Mortar: Applying mortar in swirls or circles traps air, leading to hollow spots. Always comb in straight, parallel lines.
- Not Back-Butterin: Skipping this step for large format tiles is a recipe for disaster, significantly reducing bond strength and coverage.
- Ignoring Substrate Imperfections: Trying to "build up" low spots with extra mortar is a temporary fix that often fails. Address substrate issues before tiling.
- Not Checking for Coverage (Lift Test): This simple step is often overlooked but is the most critical quality control measure during installation.
- Using Old or Improperly Mixed Mortar: Mortar has a working time. If it starts to skin over or harden in the bucket, discard it. Never add water to re-wet mortar that has started to set. Mix according to manufacturer instructions.
- Not Using Leveling Systems: For 12x24 tiles, tile leveling systems are almost a necessity. They prevent lippage and ensure a perfectly flat surface, especially with larger format tiles that are prone to slight warpage.
Ensuring E-E-A-T in Your Tiling Project
When undertaking a significant home improvement like tiling with 12x24 tiles, the principles of Expertise, Authoritativeness, and Trustworthiness (E-E-A-T) are not just for content creators; they apply directly to your project's success and the value it adds to your property. Your money and your life (YMYL) are at stake, as a poorly executed tiling job can be costly to fix and diminish your home's value.
- Expertise: Gain knowledge. This article is a starting point, but consider watching professional installation videos, reading manufacturer data sheets for your specific tiles and mortar, and even consulting with experienced tile setters. Understanding the nuances of the trowel size for 12x24 tile, mortar types, and setting techniques elevates your expertise.
- Authoritativeness: Follow industry best practices. The recommendations for trowel sizes, back-buttering, and proper coverage aren't arbitrary; they are derived from decades of professional experience and testing by organizations like the Tile Council of North America (TCNA). Adhering to these guidelines establishes your project's authority.
- Trustworthiness: Use reputable products and don't cut corners. Invest in quality tiles, a suitable LHT mortar, and the correct trowel size for 12x24 tile. Don't rush the process; allow proper cure times. A trustworthy installation is one that will last, providing peace of mind and protecting your investment.
By approaching your tiling project with this mindset, you're not just laying tiles; you're building a durable, beautiful, and valuable addition to your home, demonstrating a commitment to quality that aligns with E-E-A-T principles.
Final Checks and Long-Term Durability
Once your 12x24 tiles are set and the mortar has begun to cure, there are a few final checks to ensure long-term durability. The proper trowel size for 12x24 tile sets the foundation, but the finishing touches secure the entire installation.
- Grout Lines: Ensure your grout lines are clean and free of excess mortar before it fully hardens. This will make grouting much easier and result in a cleaner finish.
- Cure Time: Allow the mortar to cure fully before walking on the tiles or applying grout. This typically takes 24-72 hours, depending on the mortar type, temperature, and humidity. Rushing this step can compromise the bond.
- Grouting: Select a high-quality grout appropriate for your tile type and application (e.g., sanded for wider joints, unsanded for narrower). Apply grout evenly, ensuring all joints are filled, and clean off excess haze promptly.
- Sealing (if applicable): If using natural stone tiles or certain types of unglazed porcelain, consider sealing the tiles and/or grout to protect against stains and moisture.
A properly installed 12x24 tile floor or wall, using the correct trowel size and technique, can last for decades, providing a beautiful and functional surface that stands the test of time. The initial effort in choosing the right tools and following best practices pays dividends in the long run, preventing costly repairs and maintaining the aesthetic appeal of your space.
Conclusion
The journey of installing 12x24 tiles is one that demands precision, patience, and the right tools. As we've explored, the selection of the correct trowel size for 12x24 tile is not a minor detail but a foundational decision that profoundly impacts the quality, durability, and longevity of your tiled surface. From understanding the anatomy of a trowel and the science of mortar coverage to identifying the ideal 1/2-inch square-notch and recognizing when to opt for larger alternatives, every aspect contributes to a successful outcome.
Remember, a professional-grade installation is built on thorough preparation, appropriate material selection, and meticulous technique. By applying the insights shared in this guide, you are not just laying tiles; you are crafting a resilient and aesthetically pleasing surface that will enhance your home for years to come. We hope this definitive guide empowers you to tackle your next tiling project with confidence and expertise. Have you recently installed 12x24 tiles? Share your experiences and any tips you've learned in the comments below! Your insights could be invaluable to fellow DIY enthusiasts. Don't forget to explore our other tiling guides for more expert advice and inspiration.